Get Social

How to change Mysql database collation for Jira on the Ubuntu + Plesk server

Как поменять кодировку Mysql базы для Jira на сервере Ubuntu + Plesk картинка

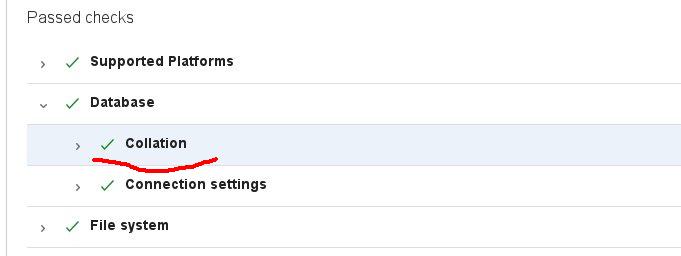
The Collation health check has failed in your system

This message was showed by Jira, some time after installation. This was due to the fact that the database and user were created by the regular tools of the Plesk panel (the same would happen in many other cases), and the database with tables in it received collation “utf8_general_ci”, which was used in Mysql by default.

The users, tasks, and work were already created, and the work was in full swing. However, there were no problems in the work, however, according to this source, it is better to correct this mistake. The system recommends using “utf8_bin” collation for the database and tables in it.

How can we check the Jira’s database and tables collation in Mysql?

Connect with current Jira db user to the database:

# mysql -u jirauser -p

Then select the database:

mysql> use jiradb;
Database changed

Check database:

mysql> SELECT default_collation_name
    FROM information_schema.schemata S
    WHERE schema_name = (SELECT DATABASE()
    FROM DUAL);
+------------------------+
| default_collation_name |
+------------------------+
| utf8_general_ci |
+------------------------+
1 row in set (0,00 sec)

Check tables:

mysql> SELECT DISTINCT C.collation_name, T.table_name FROM information_schema.tables AS T, information_schema.`collation_character_set_applicability` AS C WHERE C.collation_name = T.table_collation AND T.table_schema = DATABASE();

...
 | utf8_general_ci | qrtz_calendars |
 | utf8_general_ci | qrtz_cron_triggers |
 | utf8_general_ci | qrtz_fired_triggers |
 | utf8_general_ci | qrtz_job_details |
 | utf8_general_ci | qrtz_job_listeners |
 | utf8_general_ci | qrtz_simple_triggers |
 | utf8_general_ci | qrtz_trigger_listeners |
 | utf8_general_ci | schemepermissions |
 | utf8_general_ci | searchrequest |
 | utf8_general_ci | serviceconfig |
 | utf8_general_ci | sharepermissions |
 | utf8_general_ci | tempattachmentsmonitor |
 | utf8_general_ci | trackback_ping |
 | utf8_general_ci | trustedapp |
 | utf8_general_ci | upgradehistory |
 ...

Yes, indeed, there is a problem.

Changing Jira’s database and tables collation in Mysql

The Jira documentation says that you need to create a second database with the necessary encoding, and copy all tables into it. However, this is an inconvenient way. After that, you will need to reconfigure Jira via bin/config.sh (which requires java to run, but we only have a console server) or create a dbconfig.xml file that is not there initially and you can not just edit it to change the name of the database. So here’s the best way:

1. Stop Jira server:

# /etc/init.d/jira stop

2. Make database dump (and 1 copy – for backup):

# mysqldump -u jirauser -p jiradb > jiradb.sql
# mysqldump -u jirauser -p jiradb > jiradb_backup.sql

3. Replace “CHARSET=utf8” to “CHARSET=utf8 COLLATE=utf8_bin” in the first dump with your favorite text editor (quite suitable nano):

# nano epic_jira.sql

4. Connect to mysql via root user (we are on a server running Plesk Onyx, so such a strange line):

mysql -uadmin -p`cat /etc/psa/.psa.shadow`

5. Delete database:

mysql> DROP DATABASE jiradb;

6. Create a new database with the required collation “utf8_bin”:

CREATE DATABASE epic_jira CHARACTER SET utf8 COLLATE utf8_bin;

7. Grant rights to the user (just in case):

GRANT SELECT,INSERT,UPDATE,DELETE,CREATE,DROP,ALTER,INDEX on jiradb.* TO 'jirauser'@'localhost' IDENTIFIED BY 'PaSSwoRD12345';
 flush privileges;

8. Also, you can check the privileges:

mysql> SHOW GRANTS FOR jrepicint@localhost;

9. Next, in the console, restore database dump:

# mysql -uadmin -p`cat /etc/psa/.psa.shadow` -h localhost jiradb < jiradb.sql

10. Start Jira server:

# /etc/init.d/jira start

You can also check the collation (database and tables), as described in the beginning. In any case, you will see the state of the database if you go to the address:

http://your-jira-server/plugins/servlet/stp/view/?source=notification

Installing and Configuring Sphinx 2.2.11 (Yii with delta Indexes) on Ubuntu / Debian and RHEL / CentOS 7

There are a lot of changes after upgrade Sphinx search from version 1 to 2. Queries on the command line no longer work through searh, many directives were removed from the configuration file, and more. We’ll figure out.

Setup Sphinx 2.2.11 on Ubuntu / Debian и RHEL / CentOS 7

First we need to install the package:

Ubuntu/Debian:
aptitude install sphinxsearch

RHEL/CentOS:
yum install -y postgresql-libs unixODBC
wget http://sphinxsearch.com/files/sphinx-2.2.11-1.rhel7.x86_64.rpm
yum install sphinx-2.2.11-1.rhel7.x86_64.rpm

Configuring Sphinx 2.2.11 на Ubuntu / Debian и RHEL / CentOS 7

Ubuntu/Debian:
nano /etc/sphinxsearch/sphinx.conf

RHEL/CentOS:
vi /etc/sphinx/sphinx.conf

Sphinx configuration file consists of blocks: source, indexer and searchd.
There is example Sphinx + delta-indexes:

# for db connect to include in other sources
source dbconnect
{
	type			= mysql
	sql_host		= localhost
	sql_user		= your_db_user
	sql_pass		= your_db_pass
	sql_db			= your_db_name
	sql_port		= 3306
}

# --------- products --------- #
# sources products
source sphinx_source_products : dbconnect
{
        sql_query_pre		= SET NAMES utf8mb4
	sql_query_pre = \
	        update sphinx_delta_counter \
	        set last_post_id = (select max(id) from tb_products) \
	        where index_name = 'sphinx_index_products';
	sql_query = \
		SELECT id, title, descr \
		FROM tb_products \
		WHERE status = 1 # or any your condition
#	sql_attr_uint = id
	sql_field_string = title
	sql_field_string = descr
}
source sphinx_source_products_delta : dbconnect
{
        sql_query_pre		= SET NAMES utf8mb4
        sql_query = \
		SELECT id, title, descr \
		FROM tb_products \
		WHERE status = 1 AND id > (select last_post_id from sphinx_delta_counter where index_name = 'sphinx_index_products');
#	sql_attr_uint = id
	sql_field_string = title
	sql_field_string = descr
}
# indexes products
index sphinx_index_products
{
	source			= sphinx_source_products
	path			= /home-path-to-web-dir/example.com/sphinx_data/sphinx_products
	dict			= keywords
	morphology		= stem_ru, stem_en
	min_word_len		= 2
	docinfo			= extern
}
index sphinx_index_products_delta
{
        source                  = sphinx_source_products_delta
        path                    = /home-path-to-web-dir/example.com/sphinx_data/sphinx_products_delta
        dict                    = keywords
        morphology              = stem_ru, stem_en
        min_word_len            = 2
        docinfo                 = extern
}
# --------- / products --------- #

# some tables
# what you need
# just as it is done section above

indexer
{
	mem_limit		= 32M
}

searchd
{
	listen			= 9312
	listen			= 9306:mysql41
	log			= /var/log/sphinx/searchd.log
	query_log		= /var/log/sphinx/query.log
	read_timeout		= 5
	max_children		= 30
	pid_file		= /var/run/sphinx/searchd.pid
#	max_matches		= 1000
	seamless_rotate		= 1
	preopen_indexes		= 1
	unlink_old		= 1
	workers			= threads # for RT to work
	binlog_path		= 
#	binlog_path		= /var/log/sphinx
 # use /var/log/sphinxsearch/ and  /var/run/sphinxsearch/ paths for ubuntu
}

Replace “your_db_user”, “your_db_pass”, “your_db_name”, “/home-path-to-web-dir/example.com/” with your data. Create a folder for storing indexes, for example “sphinx_data”. Edit sql_query and sql_query_pre under your database. To do this, you need to think over the query to search, and also to select the search column and assign it to sql_field_string (if several – it means several lines must be added accordingly).

Sphinx delta index. Indexing big data.

We need use delta-indexes in order avoid to re-index the entire database during the day (if you have a large mysql database). Simply create the table “sphinx_delta_counter” in the mysql database with the column “last_post_id”. I think it is clear that the last indexed id is written here (See the query in the config). After that, we will then need to include both indexes to search query.

To work with the Russian language (or other non latin languages), you need to set the encoding of the database: SET NAMES utf8 (or SET NAMES utf8mb4), as well as the morphology: parameter stem_ru. The string “sql_query_pre = SET NAMES utf8mb4” must be written to each source separately, if you add it to the common connect – > this does not work. I spent many time, trying to resolve issue: sphinx did not index Russian words .

Configuring Sphinx for Yii2

  1. Install plugin for Yii: yii2-sphinx.
  2. Edit config/main.php (“components” section):
    'sphinx' => [
    'class' => 'yii\sphinx\Connection',
    'dsn' => 'mysql:host=127.0.0.1;port=9312;',
    'username' => '', # there is usually no need to specify anything
    'password' => '', # there is usually no need to specify anything
    ],
  3. Full-text search with morphology and other buns:
    use yii\sphinx\Query;
    $query_search = new Query();
    $search_result = $query_search->from('siteSearch')->match($q)-all();

Indexing, starting and checking Sphinx

After configuring the sphinx configuration file, we need to index all the sources that we created:
indexer --all

Then we need add records to cron service (as you can see – once a day recreates the full index, and every 5 minutes – delta):
crontab -e
0 1 * * * /usr/bin/indexer --config /etc/sphinx/sphinx.conf sphinx_index_course --rotate > /dev/null
*/5 * * * * /usr/bin/indexer --config /etc/sphinx/sphinx.conf sphinx_index_course_delta --rotate > /dev/null

Before starting the service it will be useful to make the owner “sphinxsearch” (or “sphinx”) of the folder with indexes:
chown sphinxsearch: /home-path-to-web-dir/example.com/sphinx_data

Start Sphinx service with command:
systemctl start searchd

In the Ubuntu (or Debian), possible, we get message:
Failed to start searchd.service: Unit searchd.service not found.
In this case, try other command:
systemctl start sphinxsearch
We can also include sphinx with an alternative command:
/etc/init.d/sphinxsearch start
Also, perhaps, it is necessary to replace “START=yes” (insted “START=no”) in the config file /etc/default/sphinxsearch

To verify, we can use this command:
systemctl status searchd
or
systemctl status sphinxsearch

Also, to make sure that the service is working and listening to the specified ports:
ps aux | grep search
lsof -i tcp:9306
lsof -i tcp:9312

In previous post (in sphinx 1.x) I wrote that it was possible to check the search in the console:
search -i some_index_name "search word"

Now this option was removed, but there is still a possibility to check whether everything is good with indexing and whether the necessary words fall into the index.

We can use the following command, instead of searching in the sphinx console:
indextool --dumphitlist some_index_name "search word" | more

In addition, you can check the search using a MySQL client, as suggested by the developer of Sphinx:

# To query search daemon using MySQL client:
mysql -h 0 -P 9306
mysql> SELECT * FROM test1 WHERE MATCH(‘test’);

Issues when start Sphinx service

any deprecated errors – this is a legacy from previous versions – comment out or delete these parameters

How to monitor mysql queries

Sometimes, you need to figure out which request comes from cms / cmf or another script to the Mysql server.
For example, I had to deal with the jqgrid-php library. It was unclear which query comes to the mysql server from the script.

You can, of course, install and configure mysql-proxy, but there is a simpler solution:

1. Login to Mysql-server as mysql admin (root) user.

2. Set where to write the log:
set global general_log_file='/tmp/mysql_query.log';

3. Enable log:
set global general_log = 1;

4. Run your scripts

5. Turn it off so it does not clog the server
set global general_log = 0;

6. Analyze the log:
less /tmp/mysql_query.log

7. it’s all!

Pages:12