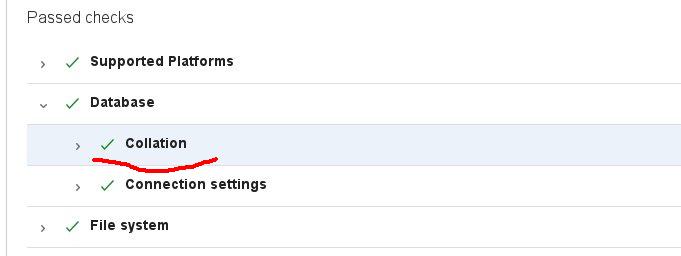
The Collation health check has failed in your system
This message was showed by Jira, some time after installation. This was due to the fact that the database and user were created by the regular tools of the Plesk panel (the same would happen in many other cases), and the database with tables in it received collation “utf8_general_ci”, which was used in Mysql by default.
The users, tasks, and work were already created, and the work was in full swing. However, there were no problems in the work, however, according to this source, it is better to correct this mistake. The system recommends using “utf8_bin” collation for the database and tables in it.
How can we check the Jira’s database and tables collation in Mysql?
Connect with current Jira db user to the database:
# mysql -u jirauser -p
Then select the database:
mysql> use jiradb;
Database changed
Check database:
mysql> SELECT default_collation_name
    FROM information_schema.schemata S
    WHERE schema_name = (SELECT DATABASE()
    FROM DUAL);
+------------------------+
| default_collation_name |
+------------------------+
| utf8_general_ci |
+------------------------+
1 row in set (0,00 sec)
Check tables:
mysql> SELECT DISTINCT C.collation_name, T.table_name FROM information_schema.tables AS T, information_schema.`collation_character_set_applicability` AS C WHERE C.collation_name = T.table_collation AND T.table_schema = DATABASE();

...
 | utf8_general_ci | qrtz_calendars |
 | utf8_general_ci | qrtz_cron_triggers |
 | utf8_general_ci | qrtz_fired_triggers |
 | utf8_general_ci | qrtz_job_details |
 | utf8_general_ci | qrtz_job_listeners |
 | utf8_general_ci | qrtz_simple_triggers |
 | utf8_general_ci | qrtz_trigger_listeners |
 | utf8_general_ci | schemepermissions |
 | utf8_general_ci | searchrequest |
 | utf8_general_ci | serviceconfig |
 | utf8_general_ci | sharepermissions |
 | utf8_general_ci | tempattachmentsmonitor |
 | utf8_general_ci | trackback_ping |
 | utf8_general_ci | trustedapp |
 | utf8_general_ci | upgradehistory |
 ...
Yes, indeed, there is a problem.
Changing Jira’s database and tables collation in Mysql
The Jira documentation says that you need to create a second database with the necessary encoding, and copy all tables into it. However, this is an inconvenient way. After that, you will need to reconfigure Jira via bin/config.sh (which requires java to run, but we only have a console server) or create a dbconfig.xml file that is not there initially and you can not just edit it to change the name of the database. So here’s the best way:
1. Stop Jira server:
# /etc/init.d/jira stop
2. Make database dump (and 1 copy – for backup):
# mysqldump -u jirauser -p jiradb > jiradb.sql
# mysqldump -u jirauser -p jiradb > jiradb_backup.sql
3. Replace “CHARSET=utf8” to “CHARSET=utf8 COLLATE=utf8_bin” in the first dump with your favorite text editor (quite suitable nano):
# nano epic_jira.sql
4. Connect to mysql via root user (we are on a server running Plesk Onyx, so such a strange line):
mysql -uadmin -p`cat /etc/psa/.psa.shadow`
5. Delete database:
mysql> DROP DATABASE jiradb;
6. Create a new database with the required collation “utf8_bin”:
CREATE DATABASE epic_jira CHARACTER SET utf8 COLLATE utf8_bin;
7. Grant rights to the user (just in case):
GRANT SELECT,INSERT,UPDATE,DELETE,CREATE,DROP,ALTER,INDEX on jiradb.* TO 'jirauser'@'localhost' IDENTIFIED BY 'PaSSwoRD12345';
 flush privileges;
8. Also, you can check the privileges:
mysql> SHOW GRANTS FOR jrepicint@localhost;
9. Next, in the console, restore database dump:
# mysql -uadmin -p`cat /etc/psa/.psa.shadow` -h localhost jiradb < jiradb.sql
10. Start Jira server:
# /etc/init.d/jira start
You can also check the collation (database and tables), as described in the beginning. In any case, you will see the state of the database if you go to the address:
http://your-jira-server/plugins/servlet/stp/view/?source=notification

